
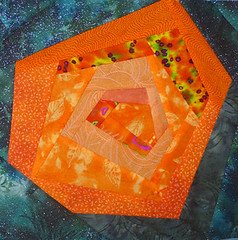
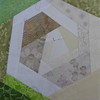
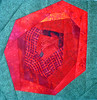
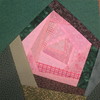
 You might call this block a Log Cabin Rose, because of the way it is constructed, a Liberated Rose, for the same reason, or a Wonky Rose, just because of the way it usually looks. I found making this block a fun challenge to create the illusion of roundness (and rose-ness) with straight seams.
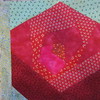
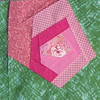
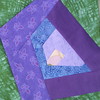
Kim made this example block (and two others in the virtual quilt at the bottom of this post). I think she conquered the challenge beautifully.
BLOCK PATTERN INFO
My notes for how to make the block are here:
Let's Grow Roses
The rose blocks you make for the Block Lotto should be 9 1/2-inches, to finish at 9 inches when sewn into a quilt.
As usual, you may make up to a maximum of NINE BLOCKS this month.
FABRIC CHOICES
For this month, please use:
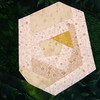
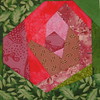
- At least three fabrics that are predominately the same color (in different shades or different scale prints) for the rose. Despite the rhyme, roses AREN'T always red and you can make yours any color except green or black. Your fabrics can be multi-color prints as long as they read as your rose color from across the room.
- Medium and/or dark greens for the leaves. The leaves are used to make your rose into a square block and should visually "recede"" and allow the rose to be the star. When making your choices, think about actually leaves from rose bushes and their more muted tones. Your green fabrics may contain other colors, but should "read" as green.
CONSTRUCTION TIPS
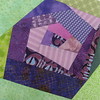
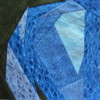
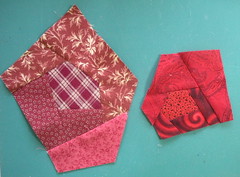 This tip has always helped me find my place and know where to add the next "log" when making log cabin blocks, no matter their shape. Once you have added all but the last log on the first round, you can always tell where the next log goes by looking for the side that has 2 seams intersecting it. In the two blocks in progress here, the one on the left was made correctly and you can see that the next log will be added to the lower left side. I lost my way on the block on the right, as evidenced by the bottom edge which as three seams intersecting it. If, like me, you occasionally goof, it's not fatal, just pick a direction and carefully add the next round of strips.
Kathie suggested that this would make a great Leader-Ender project and I agree. If you are unfamiliar with the concept, Bonnie Hunt describes it on her Quiltville web site here: Leaders and Enders. She has also authored a book, Adventures in Leaders and Enders.
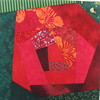
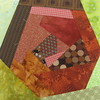
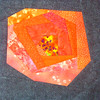
Kim shared: When I used the larger strips, they kept wanting to be square, but I hacked away the poor things. I think she did a fantastic job trimming her rose blocks and encourage you to be courageous and hack away, if that's what your blocks need.
LABELS FOR AUGUST BLOG POSTS
Please add the label " log cabin rose" to any blog posts on this blog about this block. If your blog post contains the photos of your blocks, please also add the label "Aug 2010 photos" . . . that will make it easy to link to all the block photos and to find all the discussions related to this block.
EXAMPLE BLOCKS - THE VIRTUAL QUILT
Here's a virtual quilt made from 24 of the block photos I received from sneak peekers, Andi, Caroline, Cathy, Ginny, Kate, Kathie, Kim, Pat and Sarah. Links go to blogs for those that I know about.

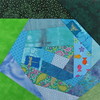


Remember, each of the individual thumbnail-sized photos in the virtual quilt are clickable, if you'd like a closer look and all the original photos of everyone's blocks will appear in the next post, A bouquet of roses from the sneak peekers, and this one, Some more early bloomers from Cathy and Sarah.
Beautiful ladies!
ReplyDeleteI love this one. I have 2 hugh totes to pick colors from. Yippeeee.
ReplyDeleteMary K
I would love to become part of the group. Am I still able to jump in and make 9 roses? Chrs
ReplyDelete